
Grow Birdhouse Gourds to Make…Birdhouses, Duh!
This isn’t a quick process, but with a little planning you can grow your own gourd birdhouse. I can see my daughter rolling her eyes right now. She’s not a fan of the little wren I’m attracting to the garden. He’s loud. Very loud. Like four-in-the-morning fog horn loud and to a teen who loves her sleep, his Reveille is the last thing she wants to hear. It’s hard to believe that something so tiny can be so vocal. Napolean syndrome, no doubt.
First the planning part, seed selection. And if this is something you’re seriously considering, I’d suggest ordering seeds ASAP. Unlike any year before, seeds were a lot like toilet paper in 2020. Everyone’s hoarding them and while I don’t think birdhouse gourd seeds will be in short supply, no one could have predicted the sudden popularity of toilet paper either.
Fortunately, I grabbed a handful of birdhouse gourd seeds at a seed swap in February 2019, long before anyone predicted a pandemic. Unless of course you’re the Simpsons whose characters have uncanny prophetic inclinations. Use any gourd that grows to a size large enough to provide ample wiggle room for a mama and her brood. Birdhouse gourd seeds are an obvious choice and widely available in big box stores as well as through online catalogs.
Unfortunately, my birdhouse gourds never grew large enough so I used a gourd I bought at the Western North Carolina (WNC) Farmers Market during our visit to the Biltmore Estate in 2019 for this project.

Here’s a chart from Birds and Blooms magazine with guidelines to follow based on the species you wish to attract…
Size Matters
Hole size, that is. The right size hole is crucial to attracting the right inhabitant. Too big and you’ll likely end up with one of the most awful and incredibly adaptable species on earth, the English sparrow also known as house sparrow. This non-native species travels in gangs, invading the nests of native species like bluebirds and smashing their eggs. Nasty creatures. A wren house requires a one-inch diameter opening.

What You’ll Need
- Appropriate sized gourd (see chart above)
- Jigsaw or drill with hole bit attachment
- 1/4″ drill bit for threading hanger
- 3/8″ drill bit for drainage holes
- 220 grit sandpaper
- 400 grit sandpaper
- Pencil (for drawing on design)
- Fine tipped Sharpie
- leather strap or wire piece for hanging
- Oil based exterior urethane
- Goggles
- Face mask for filtering fine particles
Getting Started
I mentioned at the beginning of this post that this is a lengthy process. The actual making of the birdhouse is the fast part. It’s the curing process that takes the longest, approximately 6-9 months from the time you pick the gourd. Once I picked them in early October, they went to the basement to dry out.

By May 2020, they were completely dried and while they were ready, I was not. I was in full-on garden mode by then and held off until last week to create the gourd birdhouse. It was perfect timing since it was to be a birthday present for my mom.
A Word of Caution
Before you start sanding, spring for some goggles and a mask that prevents the inhalation of fine particles. Gourd dust and mold spores are caustic, wreaking havoc on your airway. Better to err on the side of caution. By now, we’re all used to donning masks anyway so it’s no big deal.

Start by sanding off the papery skin on the gourd using a 220 grit sandpaper. Once you have it sanded, use the finer 400 grit to polish it up. Use a tack cloth or rinse the gourd to remove the dust. Once it’s dried, move to the next step.

When positioning the hole, be sure to place it on an area of the gourd that allows for direct access, not too low and not to high on the gourd. Again, refer to the chart to determine how high to place the opening as height varies by species. I penciled in the opening and used a one-inch Milwaukee Hole Dozer bit.
A jigsaw would also work. Just be careful when applying pressure with the hole bit. You want to be gentle and let the bit do the work. Otherwise, you risk cracking the gourd. I speak from experience and am grateful for clear epoxy. Once the hole is drilled, sand it to remove any sharp edges.

Attach the 3/8″ bit to the drill and add three or four holes to the bottom of the gourd for drainage. Use a 1/4″ bit to drill two holes at the top of the gourd for hanging.
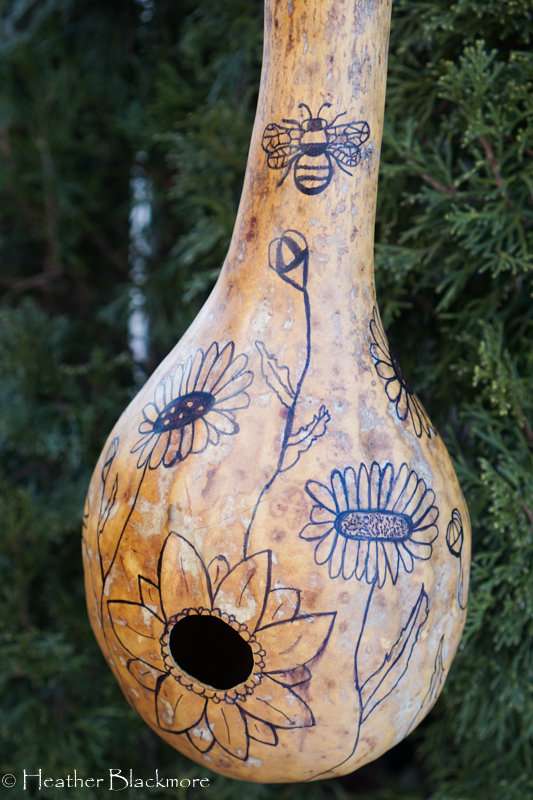
Now the fun part. Lightly pencil on your design, then go over it with your Sharpie. Thread your leather strap or wire through the holes to create a loop for hanging your birdhouse gourd.

And finally, spray the gourd with two or three coats of exterior oil based urethane. I used Varathane Crystal Clear Satin. Follow the instructions, allowing the recommended drying time between coats. A cardboard box prevents the spray from hitting the garage floor.
A note on temperature. It’s January and quite cold, even in the garage where it was 40 degrees and not the optimal temperature for applying urethane which, for this particular urethane, was 50 degrees F. I applied three thin coats, allowing each to dry in the basement before applying the next one. The hanger comes in handy for manuevering as you spray and for hanging it to dry.

I was a little sloppy with the first application and sprayed too much near the opening which caused some of the ink to bleed. You can see it on the petals to the right of the opening. Live and learn. What matters is that my mom loved it.
By the way, I have a Youtube channel called Here She Grows where I share what’s happening in the garden as well as tons of tips, tricks and ideas to help you grow a garden as simply and affordably as possible.
Check it out and hey, thanks for reading and watching! I hope you’ll grow with me.


Thank you for this post! I hope to find you on Instagram. Question: many recommend bleaching 10-1, does that include the inside of the gourd? It doesn’t seem like it should but…? Do you use bleach?
thanks, Teri
Hi Teri, thanks for dropping in! I didn’t bleach the one featured in the post. But for the ones I grew and harvested this summer, I washed them with Dawn soap then did the 10-1 bleach solution just to kill any bacteria that could rot the gourds. I won’t be bleaching the inside however once I drill the holes after they’ve dried out. I don’t think that’s necessary.
For me, winter is the best time to make a home for my birds from gourds. I begin by cleaning the gourd with warm soapy water, then wiping it with rubbing alcohol or distilled vinegar after it dries. The soapy water cleans most of the debris while the alcohol or vinegar chemically cleans it.
Such a great winter project. I was so disappointed this year when all my gourds (except two) rotted. Not sure what I did wrong. Any ideas or tips for this year?